Español
 عربى
 Deutsch
 русский
 Français

A two-person crew finished the rough-in of a 1978 ranch house before lunch: 240 feet of half-inch PEX-B, eleven tees, three isolation valves, and more than four hundred crimp rings. The pressure test that afternoon found two weeping joints out of roughly eight hundred. Both failures looked identical, and neither one was caused by a weak squeeze or a cheap tool. The rings on those two joints had been slid into place about half an inch back from the shoulder of the fitting, so the copper was squeezing tubing against the smooth barrel of the fitting instead of against the barbed section that actually grips and seals. The tool had done exactly what it was built to do.
That is the entire subject of this article compressed into one afternoon. A PEX crimp tool is not hard to operate. It is a two-handled device with a ratchet, and almost anyone can close it. What separates a joint that holds at 100 psi from one that weeps on the second day is everything that happens around the squeeze: which ring you are holding, which jaw you installed, how far the tube is seated, where the ring sits, and whether anyone bothered to check the result before the drywall went up.
Here is the short version, and the rest of this page exists to support it. Match the ring to the fitting standard, match the jaw to the ring size, cut the tube square, seat the tube fully, place the ring inside the correct band, close the jaws completely in one motion, and prove the crimp with a GO/NO-GO gauge before you move to the next joint. If you do those seven things in that order, crimped PEX is one of the most reliable plumbing connections available. Skip the last one, and you are guessing.
The short answer: what a PEX crimp tool actually does
A crimp tool does not glue, solder, tape, or weld anything. It deforms a soft copper ring down to a controlled outside diameter, and that deformation is what creates the seal. The PEX tube is trapped between the copper ring on the outside and the barbed brass fitting on the inside. The barbs bite into the tube wall, the copper holds the tube against those barbs, and the contact pressure between tube and fitting is high enough that water cannot migrate past it.
Everything about the connection therefore depends on one dimension: the final outside diameter of the crimped ring. That dimension is not a suggestion. Standards such as ASTM F1807 define an acceptable range for each nominal size, and the ring manufacturer publishes a gauge that measures whether your crimp landed inside that range. Too loose, and there is not enough contact pressure to hold against thermal expansion, water hammer, or a small pressure spike. Too tight, and you have crushed the tube wall, cracked the ring, or created a stress point that will fail later.
The tool's only real job is to stop at the right diameter, every single time, in a hundred thousand squeezes. That is why hand crimp tools have a ratchet: the ratchet locks the handles and refuses to release until the jaws have bottomed out, so an operator with tired hands cannot produce a half-crimp by letting go early. It is also why the jaws matter more than the handles. A worn or incorrect jaw set will close to the wrong dimension no matter how strong you are.
Three variables decide whether the joint holds
- The ring standard: the copper ring, the fitting, and the tubing must all be listed for the same connection system.
- The ring position: the copper must sit over the barbed section of the fitting, within the band the fitting maker specifies.
- The crimp diameter: the finished ring must land inside the published range, verified with a gauge rather than judged by eye.
Notice what is not on that list: brand loyalty, how expensive the tool was, and how strong the person squeezing it is. Those things affect comfort and durability, not the physics of the joint.
Identify the connection system before you pick up any tool
This is the step that gets skipped most often, and it is the one that produces the most wasted afternoons. "PEX tool" is not a single category. There are at least four different mechanical connection families in common use, and the tools are not interchangeable. Using the wrong tool on the wrong ring does not create a weak joint; it creates no joint at all, or it creates one that looks perfect and lets go under pressure.
Copper crimp rings
This is the system most people mean when they say "crimp tool." A soft copper ring is compressed by a tool with a jaw sized to that ring. The fittings are barbed brass, and the standard is ASTM F1807 in North America. The crimp jaw closes to a fixed dimension, and the ratchet ensures full closure.
Stainless steel clamps
Stainless steel pinch clamps look similar on the outside and are installed with a completely different tool that squeezes the ear of the clamp. The clamp does not deform to a measured diameter; it deforms until the ear closes. A crimp tool with a copper-ring jaw cannot install a stainless clamp, and a clamp tool is useless on a copper ring.
PEX-A expansion fittings
Expansion systems work in the opposite direction. The tool stretches the end of the tubing and a plastic or brass expansion fitting is inserted before the tubing shrinks back around it. There is no ring at all. Expansion heads and crimp jaws are not related, and a technician who reaches for the wrong tool will discover the problem immediately, which is at least better than discovering it during a pressure test.
Press fittings
Press systems use a tool with larger jaws that compress a stainless steel sleeve over the fitting body. Press tools are usually battery-powered or hydraulic for anything above half an inch. A press connection and a crimp connection can sit on the same job, but they cannot share a tool. If you are weighing the two approaches, our overview of PEX-A and PEX-B connection methods covers how the fitting families differ.
One more thing about tubing. Copper crimp ring systems are most commonly installed on PEX-B, but PEX-A tubing is also listed with crimp rings by some manufacturers. The tubing itself carries a print line that states which standards it meets. Read it. Then read the fitting's spec sheet. A copper ring, a clamp, a press sleeve, and an expansion ring are all the same size in your hand and completely different in how they work.
What you need on the bench before you squeeze anything
Gather the whole kit before the first cut, because stopping mid-joint to hunt for a gauge on a ladder is how mistakes get made. A complete crimp station for a typical half-inch and three-quarter-inch residential job looks like this:
- A crimp tool with the correct jaw or head for each size you are installing, in calibration.
- Copper crimp rings in the matching sizes, kept clean and dry, from a sealed bag rather than the bottom of a bucket.
- A GO/NO-GO gauge for each ring size, and if you use more than one ring brand, a gauge for each brand.
- A ratcheting PEX cutter that produces a square, burr-free cut. Not a hacksaw, not a utility knife, not a copper tubing cutter with a deep wheel.
- A deburring or reaming tool for the inside of the tube, or a cutter with a built-in reamer.
- A marker or insertion-depth gauge if your fittings do not have a shoulder stop you can feel.
- Clean rags and a small brush, because grit inside a fitting is a slow leak with a long fuse.
- A torque-free flat surface or a bench vise with soft jaws for making test crimps when you calibrate.
For work above one inch, or for a day with three hundred joints, hand tools stop making sense. A hydraulic or battery-powered crimp head does the same job with the same jaw geometry, but it removes the hand fatigue that turns a careful installer into a fast one by three in the afternoon. Hand fatigue is a real failure mode, because it pushes people toward partial squeezes and skipped gauge checks.
How to use a PEX crimp tool: the full sequence
The sequence below is written for a copper crimp ring on a barbed brass fitting, which is the most common hand-crimped connection. Work through it in order. Every step exists because someone, somewhere, skipped it and paid for the call-back.
- Confirm the standard and the size. Read the fitting, the ring bag, and the tubing print line. Confirm that the ring, fitting, and tubing are listed together. Confirm that the jaw installed in the tool matches the ring size — half-inch jaw, half-inch ring. Jaw sizes are usually stamped or color-coded, and mismatched jaws are one of the most common causes of a failed gauge check.
- Cut the tube square. Use a ratcheting PEX cutter and make one clean, perpendicular cut. A cut that is even a few degrees off will leave a crescent-shaped gap between the tube end and the fitting shoulder, and the ring will compress tubing against a surface that is not there. If the cut looks ragged or the tube is flattened at the end, cut again a couple of inches back.
- Inspect and re-round the cut end. PEX that has been sitting in a coil or pulled hard around a corner can be slightly oval. Squeeze the end back to round with your fingers or a re-rounding tool. An oval tube pushed onto a round barb will not seat evenly, and it can shave material off the fitting.
- Deburr the inside edge. A sharp inner lip can catch on the barb and fold the tube wall as it slides on. A light twist of a deburring tool is enough. Do not bevel the outside edge, because the outside surface is what the ring seals against.
- Mark the insertion depth. If the fitting has a visible shoulder or a hard stop, you can feel when the tube bottoms out. If it does not, mark the correct depth on the tube with a marker or use a depth gauge so you can see the tube has gone all the way in.
- Slide the ring onto the tube first. Push the copper ring onto the free end of the tube and move it back out of the way, at least a few inches from the cut end. Trying to slip a ring over a fitting after the tube is seated is a common shortcut and a reliable way to damage the ring.
- Seat the tube fully onto the fitting. Push with a steady, straight force until the tube bottoms out on the fitting shoulder or the depth mark lines up with the end of the fitting. Twist slightly as you push if the fit is tight, but never force it at an angle. If the tube stops short, pull it off and check for a burr or debris rather than pushing harder.
- Position the ring inside the correct band. This is the step that ruined the two joints in the opening story. The ring must sit over the barbed section of the fitting, roughly 1/8 inch to 1/4 inch (about 3 mm to 6 mm) back from the end of the fitting, depending on the fitting maker's instruction. Too far forward and the ring pinches the tube where there is no barb underneath. Too far back and part of the ring hangs off the barbed zone. Keep the ring square to the tube as you set it.
- Place the jaws squarely over the ring. Open the handles so the jaws are fully apart, then fit the jaw seat over the ring. The tool should sit perpendicular to the tube axis, with the ring centered in the jaw. If the tool is cocked to one side, the finished ring will be uneven and the gauge will tell you so.
- Close the handles in one continuous motion. Squeeze smoothly until the jaws meet and the ratchet releases on its own. Do not pump the handles, do not stop halfway to reposition your grip, and do not stop early and force the release lever. On a properly functioning tool, the ratchet will not let you release until the crimp is complete. That feature exists specifically so that a tired installer cannot produce a partial crimp.
- Verify the crimp with the gauge. Slide the GO/NO-GO gauge over the crimped ring. The larger GO opening should slip over the ring, and the smaller NO-GO opening should not. If the NO-GO side slides on, the ring is over-compressed. If the GO side will not fit, the ring is under-compressed. Either result means cut the ring off and start the joint again with a new ring.
- Inspect the finished joint visually, then move on. The ring should be square to the tube, uniformly compressed, and free of cracks or gouges. The tube should show no white stress marks or crushed areas next to the ring. Then leave it alone. Crimping the same ring a second time does not improve the connection; it work-hardens the copper and pushes the diameter out of range.
Two joints in a row that fail the gauge check is a signal, not bad luck. Stop, re-check the jaw size, re-check the ring position, and make a test crimp on scrap tubing before continuing. Production speed is irrelevant if the joints have to be cut out later.
Reading the crimp: GO/NO-GO gauges and the numbers that matter
The gauge is a flat metal tool with two openings, or in some designs a single opening with a stepped edge. It is the difference between a verified connection and an opinion. The logic is simple once you see it as a measurement problem: you are checking whether the outside diameter of the crimped ring falls between a minimum and a maximum. The larger opening is the maximum allowed diameter, and it must pass over the ring, which proves the ring is not too large. The smaller opening is the minimum allowed diameter, and it must not pass over the ring, which proves the ring is not too small.
Ring manufacturers publish their own ranges, and the gauge that comes with the ring is the authority for that ring. The figures below are typical published ranges for copper crimp rings and are useful for understanding what a gauge is actually measuring, but they should never override the instruction sheet in the box.
| Nominal tube size | Typical acceptable crimped outside diameter | What the gauge is telling you |
|---|---|---|
| 3/8 in. | 0.470 in. to 0.490 in. | GO opening slips over; NO-GO opening does not |
| 1/2 in. | 0.590 in. to 0.610 in. | GO opening slips over; NO-GO opening does not |
| 5/8 in. | 0.690 in. to 0.710 in. | GO opening slips over; NO-GO opening does not |
| 3/4 in. | 0.790 in. to 0.815 in. | GO opening slips over; NO-GO opening does not |
| 1 in. | 1.005 in. to 1.040 in. | GO opening slips over; NO-GO opening does not |
Notice how narrow those windows are. A half-inch ring has roughly twenty thousandths of an inch of acceptable range, which is about the thickness of five sheets of paper. That is why a gauge check is not optional, why a worn jaw matters, and why "it looks fine" is not a verification method. It is also why a ring that has been crimped twice, or crimped with the wrong jaw, or crimped with a tool that is out of adjustment, will usually still look perfectly normal to the eye.
Adjusting and calibrating the tool
Many hand crimp tools have an adjustment screw or knurled wheel near the jaw pivot, and many others are set at the factory and not meant to be adjusted at all. The first thing to establish is which type you are holding, because turning an adjustment on a fixed tool usually means replacing a perfectly good tool.
On adjustable tools, the adjustment changes how far the jaws close. The procedure is the same across brands, and it takes about ten minutes:
- Make three test crimps on scrap tubing and scrap rings, using the exact ring and fitting you are installing on the job.
- Check each test crimp with the GO/NO-GO gauge.
- If the NO-GO opening slips over the ring, the ring is smaller than the minimum allowed diameter, which means the tool is closing too far. Open the adjustment slightly.
- If the GO opening will not slip over the ring, the ring is larger than the maximum allowed diameter, which means the tool is not closing far enough. Close the adjustment slightly.
- Repeat the test crimps until three consecutive crimps pass the gauge check, then lock the adjustment.
Two practical notes. First, an hour spent calibrating is worth it because the same tool will then produce hundreds of correct joints. Second, the ratchet mechanism is separate from the adjustment. A ratchet that releases early, or that requires the release lever to be pressed before full closure, is a mechanical problem rather than a calibration problem, and the tool should be serviced or replaced rather than adjusted around.
For anyone crimping professionally, a calibration check at the start of every job is a reasonable habit, and a written record of that check is useful when a general contractor asks how the joints were verified. Jaws wear. They get dropped on concrete, they pick up grit, and they slowly change dimension. A tool that passed last month may not pass today.
The mistakes that actually cause leaks
Failed crimped joints are not random. In practice they cluster around a short list of causes, and almost all of them are visible before the pressure test if anyone looks.
- Ring positioned too far back from the fitting shoulder. The copper compresses tubing against the smooth barrel instead of the barbs. The joint holds at low pressure and weeps when the system is pressurized or when hot water expands the tube. This is the single most common cause of a leak on an otherwise perfectly crimped ring.
- Tube not fully seated. The tube stops short of the shoulder, usually because of a burr, debris, or pushing at an angle. There is less barb engagement than the fitting was designed for.
- Out-of-square cut. A diagonal cut leaves a gap and reduces the sealing surface. Cut with a ratcheting PEX cutter, not a hacksaw.
- Crimped at an angle. The tool was not perpendicular to the tube, so the ring compressed unevenly and part of it is outside the acceptable diameter range.
- Wrong jaw size or wrong jaw set. A three-quarter jaw used on a half-inch ring, or a jaw that has been swapped between tools without re-checking calibration.
- Crimp tool used on a stainless steel clamp. The ring is not copper, the tool is not designed for it, and the resulting connection has no defined crimp diameter at all.
- No gauge check. The most expensive shortcut in the trade. Gauge checks take a few seconds per joint and eliminate most of the list above.
- Re-crimping a ring, or crimping over a damaged ring. Copper work-hardens. A second squeeze does not fix a bad joint; it changes the dimension and can crack the ring.
- Dirty or wet fittings. Grit prevents full insertion; water inside the fitting can prevent the tube from seating on the shoulder if it is pushed in with trapped air.
- Burying joints with no access. Even a correctly crimped joint benefits from access, or at minimum from a documented test before the wall closes.
Notice that none of these are caused by using a hand tool instead of a battery tool, or by buying an inexpensive crimp tool instead of an expensive one. They are caused by sequence errors, and sequence errors are free to avoid.
Tight spaces, retrofits, and cold weather
Real installations rarely happen at a comfortable bench height. Crimping between joists, above a ceiling grid, inside a vanity cabinet, or behind a shower valve body changes the technique without changing the rules.
In tight spaces, the limiting factor is usually jaw access and handle swing, not the crimp itself. Options include compact crimp heads with shorter handles, right-angle or offset jaw adapters, and crimp heads driven by a battery or hydraulic pump where the handle swing will not fit. If you can place the jaws squarely over the ring and get a full stroke, the joint is fine. If you cannot achieve a full stroke, do not improvise by squeezing in stages; reconfigure the tool or the access.
Temperature deserves a mention because it changes how the tubing behaves, not how the ring behaves. Cold PEX is stiff, less willing to slide onto a barb, and more likely to be pushed at an angle when the installer is wearing gloves. Warm PEX is softer and easier to seat, but it also expands, which matters when you are cutting a run to length between two fixed points. A few practical habits help:
- Keep coiled tubing indoors the night before a cold-weather installation so it is pliable at the start of the day.
- Never crimp a tube that contains ice or has been flattened by a freeze.
- On long runs, allow for thermal movement at the ends rather than fighting it at the fitting.
- In hot weather, cut and fit in the same session; tubing that has been sitting in direct sun will shrink slightly as it cools.
Retrofit work adds one more consideration: existing water in the line. Crimping does not require a dry system the way soldering does, but water running through a fitting makes it harder to confirm that the tube has seated, because you cannot hear or feel the shoulder contact as clearly. Shut the branch down and blow it out if you can. It is faster than redoing a joint that looked seated and was not.
Choosing a crimp tool: what the specifications really mean
If you crimp fewer than twenty joints a year, almost any correctly sized, calibrated hand tool will do the job, and the main considerations are jaw availability and whether a gauge is included. If you crimp every week, the specification sheet starts to matter in ways that affect your hands and your schedule rather than the quality of the joint.
Size coverage
Single-size tools do one ring size and do it well. Multi-head tools accept interchangeable jaws or heads, usually covering 3/8 inch through 1 inch. Multi-head kits cost more up front but replace three or four tools, and the heads are easy to misplace, so keep them in a case with a labeled slot for each size.
Ratchet design
A full-closure ratchet is not a luxury feature; it is the mechanism that makes consistent crimps possible. Confirm that the tool releases automatically at full closure and that the emergency release lever works smoothly, because you will need it if a jaw jams on a ring.
Adjustability and calibration support
Adjustable tools can be corrected when they drift. Non-adjustable tools must be replaced or serviced. Ask the supplier how the tool is calibrated and whether replacement jaws are available, because a tool with no spare parts is a disposable tool.
Drive type
Hand tools are appropriate up to about three-quarter inch in moderate volumes. One-inch crimps, overhead work, and long production days are far more comfortable with a battery or hydraulic crimp head. The jaw geometry and the resulting crimp diameter are the same; only the effort changes.
Gauge and documentation
Buy a gauge for every ring size you install, even if the tool kit includes one. Gauges are cheap, they get lost, and a gauge is the only way to answer the question "was this joint verified?"
The other half of the joint — the fitting itself — deserves the same scrutiny as the tool. If you are working with a mixed system and want to understand how a press-style connection compares, a brass PEX press fitting equal tee is a useful reference point for how the alternatives are constructed.
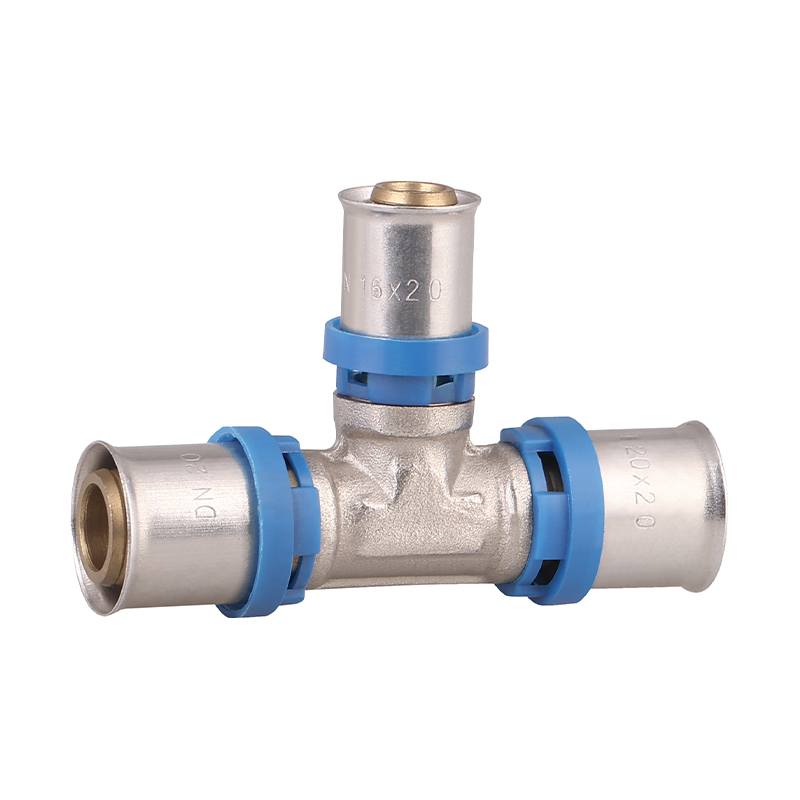
The fitting side of a crimped joint
Tool choice gets all the attention, but the fitting is where the joint actually seals. Three material and dimensional points matter when you are specifying fittings for a crimped PEX system.
Dimensional compliance with the ring standard
A barbed fitting intended for copper crimp rings has a specific barb profile, insertion depth, and shoulder geometry. A fitting designed for a different connection system may look similar and measure differently, and mixing them produces joints that pass a visual check and fail a gauge check or a pressure test. Keep the ring standard and the fitting standard matched.
Material and water chemistry
Brass fittings are the norm because brass machines well and holds a barb profile accurately. For aggressive water — high chloride, low pH, or high dissolved solids — dezincification-resistant (DZR) brass is the safer choice, because standard brass alloys can lose zinc over years of exposure and become porous. Lead-free alloy requirements for potable water also differ by market, so confirm the fitting's listing for the water it will carry. Bronze, stainless steel, and nickel bronze fittings appear in the same catalogues and are chosen for corrosion resistance or for higher mechanical loads rather than for crimp compatibility alone.
Valves in the same run
Isolation valves on a crimped PEX line are usually the first thing a service technician touches, so they are worth choosing deliberately. A brass PEX ball valve gives full-port flow and a quarter-turn shutoff that matches the connection style of the run, and it removes the need for an adapter at the fixture. Where the run simply needs to continue through a wall or a manifold, a brass PEX coupling handles the transition with the same connection type as the rest of the line.
Pressure and temperature ratings should be read as a system, not per component. The tubing, the ring, and the fitting each carry their own rating, and the assembly is limited by the lowest of them. A fitting rated for 200 psi at 73 degrees Fahrenheit may be rated considerably lower at 180 degrees Fahrenheit, which is exactly the range a domestic hot water line experiences.

Testing and documenting the work
A crimped joint that passes the gauge check is dimensionally correct. That is a strong statement, but it is not the same as a leak-free system, because leaks also come from thread connections, valve bodies, and the occasional ring that was correct but damaged during installation. A pressure test closes that gap.
Most plumbing codes require a hydrostatic test on new potable water piping before it is covered or put into service. A common field practice is to pressurize the system to 100 psi, or to one and a half times the working pressure where the code specifies that, hold it for at least thirty minutes, and inspect every joint. Local requirements vary, so follow the authority having jurisdiction rather than a rule of thumb from a forum. Where air testing is permitted at all, it is usually limited to lower pressures for safety reasons, because compressed air stores far more energy than water.
A practical test routine that catches problems early:
- Isolate the new section from the existing system so a pre-existing leak is not blamed on new work.
- Pressurize slowly and watch the gauge for a few minutes before walking the line.
- Dry each joint with a paper towel before inspecting; a dry joint that shows a bead of water after ten minutes is a leak.
- Check joints from underneath where possible, because water follows the fitting and appears lower than the source.
- Mark the location of every joint in a wall or ceiling before closing it, even if the test passed.
- Record the test pressure, duration, date, and the tool calibration check for the day.
If a joint does fail, cut the ring off rather than trying to tighten anything. Copper crimp rings cannot be tightened, and a second crimp will not restore the correct diameter. Cut the tube back past the old ring, install a new ring, and redo the joint properly. If two joints in the same run fail, stop and re-verify the tool before continuing, because the problem is almost certainly in the equipment or the technique rather than in the fittings.
Keeping the tool in working condition
A crimp tool is a measuring instrument with handles. Treat it like one and it will stay accurate for years; treat it like a hammer and it will drift out of calibration without telling you.
- Wipe the jaws after every session. Grit between the jaw seats changes the closure dimension.
- Lubricate the pivot and ratchet only where the manufacturer's manual allows. Over-lubricating a ratchet attracts dust and causes sticking.
- Store the tool in its case or a drawer, not loose in a bucket with pipe wrenches.
- Never use the jaws to pry, straighten, or grip anything. The jaw seat is a precision surface.
- Check the jaws for chipping, rust, and deformation at the start of each job.
- Verify calibration with a gauge whenever the tool has been dropped, borrowed, or stored for a long period.
- Follow the manufacturer's service interval for jaw replacement. Jaws are consumable parts.
Rings deserve similar treatment. Copper crimp rings are annealed to a specific softness so that they deform predictably. Rings that have been exposed to weather, dropped in a muddy trench, or left loose in a truck bed will not deform the way the standard assumes. Keep them in the original packaging until they are used, and do not use a ring that is visibly bent, corroded, or deformed before it is even installed.
Going back to that ranch house with two weeping joints: the fix took twenty minutes, and the cause was a habit rather than a tool. Someone had been setting rings by feel instead of by the shoulder, and the joints that held were holding because the ring happened to land in the right band. That is the difference between a good crimp and a lucky one, and it is the reason the sequence in this article is worth following in order every time.
Squeeze the handles last. Before that, confirm the standard, match the jaw, cut square, seat fully, place the ring in the band, and then close the tool in one full stroke. When you are finished, slide the gauge over the ring and let it tell you whether the joint is good. On a job with eight hundred joints, that extra three seconds per connection is about forty minutes of work. It is also the cheapest insurance available against a call-back, a wet ceiling, and a reputation that takes far longer to repair than the joint ever did.