Español
 عربى
 Deutsch
 русский
 Français

A half-inch crimp ring sitting three millimetres too far back from the end of the tube will hold air during a rough-in test and weep quietly six months later, usually inside a wall that has just been closed and painted. The tool did its job. The ring was simply in the wrong place, and nobody ran a gauge over it. That single failure pattern explains most of the callbacks on crimp-ring PEX systems, and it is the reason this guide puts ring position and gauging ahead of tool technique.
Here is the short version before the detail: using a PEX crimp tool well means buying the right jaw size, preparing the tube squarely, seating the ring inside the correct window, closing the jaws completely until the ratchet releases, and then proving the joint with a go/no-go gauge at two points around the ring. The squeezing motion takes two seconds. Everything around it is what separates a 30-year joint from a warranty claim. What follows walks through tool selection, the eight-step joint, gauge reading, failure diagnosis, cold-weather work, pressure testing, and the brass fittings and valves that sit at the end of the run.
The crimp tool does exactly one thing, which is why joints fail
A copper crimp ring arrives slightly oversized for the tube it will grip. The tool's jaws close on that ring and reduce it to a controlled outside diameter, swaging the PEX wall tightly onto the barbs of the insert fitting. That is the entire mechanical event. The tool cannot correct an out-of-square cut, cannot detect a ring positioned over the wrong part of the barb, cannot see that the tube was pushed in only 80 percent of the way, and cannot tell whether the ring belongs to the same standard as the fitting.
Field data from warranty work points the same way year after year: the majority of leaking crimp joints pass a casual visual inspection. The ring looks closed, the fitting looks seated, the tube looks straight. What fails is the dimension nobody measured. A crimper that has drifted out of calibration, or a ring that was crimped at an angle so the jaws never bottomed out, produces a joint that looks identical to a good one at arm's length.
It also matters that not every PEX connection is a crimp joint. Four systems are common in residential and light commercial work, and the tools are not interchangeable between them. Before anything else, confirm which system you are installing.
| System | What the tool compresses | Standard reference to verify | Tool character | Where it usually goes wrong |
|---|---|---|---|---|
| Copper crimp ring | Soft copper ring over tube and barb | ASTM F1807 for metal insert fittings; ASTM F2159 for plastic insert fittings with copper rings | Manual ratchet, battery, or hydraulic crimper with size-specific jaws | Ring outside the gauge window, jaws not fully closed, ring cracked by a second crimp |
| Stainless pinch clamp | Stainless clamp closed over the tube | ASTM F2098 | Dedicated clamp tool; not a crimp jaw | Clamp rotated out of position before closing; clamp reused after removal |
| Cold expansion | The tube itself, expanded before the fitting is inserted | ASTM F1960 | Expansion head and cone, often battery driven | Expansion cycle not held to completion; tube end not square |
| Press | A stainless sleeve compressed by press jaws | Manufacturer's listing for the specific press system | Heavy press tool with size and profile-specific jaws | Wrong jaw contour for the fitting, or press cycle interrupted |
The practical takeaway is that a crimp ring, a clamp, an expansion sleeve, and a press sleeve all look like "a metal ring on a plastic pipe" to someone walking past the trench. Ordering by photo is a real and expensive habit. Read the fitting, not the picture.
Match the jaw, the ring, and the fitting before the first squeeze
Crimp rings are sold by nominal tube size: 3/8, 1/2, 5/8, 3/4, and 1 inch, with 1/2 and 3/4 inch covering most of a house. The jaw must match the ring, not the fitting body and not the thread on the other end. A 1/2-inch jaw used on a 3/4-inch ring will not close, and forcing a tool past its ratchet is how jaws get bent and how a crew ends up with a tool that quietly under-crimps everything afterwards.
Colour coding on rings exists but is not universal across manufacturers, so treat colour as a convenience only. The reliable checks are the nominal size printed on the ring packaging, the size stamped on the jaw, and the standard the fitting is listed to. If a ring has no legible marking and no packaging, it goes in the scrap bin. Soft copper rings also work-harden and corrode; a ring with green verdigris or a visible flat spot from being dropped on a concrete floor should not be installed.
| Nominal size | Tube outside diameter | Typical use | Crimp tool note |
|---|---|---|---|
| 3/8 in | 1/2 in | Fixture connections, icemaker and filter lines | Smallest jaw; the ring is easy to over-crimp and crack |
| 1/2 in | 5/8 in | Branch lines, most fixture groups | The workhorse size; a manual ratchet handles it comfortably |
| 5/8 in | 3/4 in | Larger fixtures, some hydronic branches | Less common stock; confirm ring availability before specifying |
| 3/4 in | 7/8 in | Trunk lines, manifolds, main runs | Leverage becomes a factor; long handles or battery tools earn their price |
| 1 in | 1-1/8 in | Commercial branch mains, large manifolds | Hand crimping is slow and fatiguing; hydraulic or battery is standard practice |
Tube type deserves a line of its own. Crimp-ring fittings are listed for PEX tubing generally, but the tubing must be marked and must match the fitting system's listing. PEX-A and PEX-B behave differently at the cut end: PEX-A is more flexible and recovers from ovality quickly, while PEX-B holds a set and needs a cleaner, squarer cut to seal reliably. If you are unsure which you have, the printing along the tube wall settles it, and a comparison of PEX-A and PEX-B differences is worth ten minutes before a large order is placed.
The kit: what should be within arm's reach
Crimping is fast, so the surrounding kit determines whether a run takes an afternoon or a week of callbacks. These items belong at the work face, not in the van:
- A wheel-type tubing cutter rated for plastic pipe. A hacksaw leaves burrs that reduce flow and can shave the fitting barb during insertion.
- A deburring and gauging tool that squares the cut face and restores roundness after the cutter compresses the tube.
- A permanent marker for insertion depth, or a depth gauge if the fitting manufacturer supplies one.
- The go/no-go gauge that came with the tool. Gauges are matched to ring size and to the tool's calibration, so keep them together.
- A digital caliper for the daily jaw-gap check. This is the single most neglected item in the kit.
- Spare rings in each size on the job, plus a ring cutter for removing a failed crimp without damaging the tube.
- Safety glasses. Copper rings occasionally spit a sliver when they crack, and the ring cutter produces sharp curls.
A small detail with a large effect: keep rings in a closed container, not loose in a bucket with fittings. Rings that have been walked on, dropped from a ladder, or rattled against a thousand brass elbows for two weeks will show flat spots and hairlines that are easy to miss until they split during crimping.
Eight steps to a joint that passes inspection
The sequence below assumes a metal insert fitting listed to ASTM F1807 and a matching copper crimp ring. Variations exist between manufacturers, so the fitting or tool instructions always take precedence if they differ.
- Cut the tube square with a wheel cutter, keeping the cut perpendicular within a couple of degrees. A visibly slanted cut is a remake, not a save.
- Deburr and re-round the end with the gauging tool. On PEX-B especially, this step prevents the ring from catching on a raised lip.
- Mark the insertion depth on the tube with a marker, using the fitting shoulder as the reference. The mark must disappear into the fitting.
- Slide the crimp ring onto the tube first, before the fitting, and push it well back so it does not sit on the insertion zone.
- Insert the fitting until the tube bottoms against the shoulder and the depth mark meets the fitting face. Push, do not twist; twisting can roll the barb and shave the tube.
- Position the ring so it sits over the barbed section, roughly 1/8 to 1/4 inch from the tube end, and squarely on the tube. Use the tool's ring-position gauge if it has one.
- Open the jaws fully, seat them squarely over the ring, and close until the ratchet releases or the jaws bottom out. On a ratchet tool, the handle will not open again until full closure has been reached, which is the feature that protects the joint. Never force a ratchet open mid-stroke.
- Release, then check the ring with the go/no-go gauge at two points roughly 90 degrees apart, and look at the ring for cracks, skew, and gaps at the fitting shoulder.
Steps 6 and 7 are where the money is. Ring position controls how much barb is engaged; a ring placed half a barb too far forward grips less and concentrates stress at the tube shoulder. Jaw alignment controls whether the ring is compressed evenly around its circumference; crimping at an angle produces an elliptical ring that may pass a single-point gauge check and still leak under thermal cycling.
What full closure actually feels like
On a manual ratchet crimper, the last few millimetres of handle travel carry a distinct rise in resistance followed by a release. That release is the signal that the tool has reached its designed crimp diameter. Crews working in awkward positions, arm extended into a joist bay, often stop short because the resistance feels like the limit of the tool. It is not. If the tool cannot be closed to release, the jaw size or ring position is wrong, and the joint needs to come apart rather than be forced.
Never crimp twice
A second squeeze on an already-crimped ring adds no sealing force and does crack rings, particularly the 3/8-inch size. If the ring looks marginal, cut it off and start again with a new ring on a freshly cut tube end. Copper rings cost cents; a reopened wall costs days.
Reading the go/no-go gauge correctly
The gauge is a small plate with two slots or notches of slightly different widths, moulded or stamped to the crimp diameter range for that ring size. The reading convention is simple once you know it: the crimped ring must pass the "go" check and fail the "no-go" check. If both pass, the ring was under-crimped; if neither passes, the ring was over-compressed, is the wrong size, or the tube wall is thicker than the system allows.
Two habits make the gauge useful rather than decorative. First, gauge at two positions about 90 degrees apart, because a crimped ring is slightly elliptical by nature and a single reading can flatter a bad crimp. Second, gauge immediately, while the joint is still accessible, and record the check on the inspection sheet if the project requires documentation. Gauging after the drywall goes up is an academic exercise.
Gauges wear. A gauge that has lived in a pocket with screws for a year may have rounded edges that let an under-sized ring slip through. Replace gauges when the edges show visible rounding, and never modify a gauge to make it "fit better".
Failure modes you will actually see on site
Most failed crimp joints fall into a small number of recognisable patterns. Diagnosing the pattern matters, because the fix is different for each one and repeating the same mistake across forty joints is how an entire rough-in gets condemned.
| Symptom | Likely cause | Correct action |
|---|---|---|
| Ring slides along the tube after crimping | Ring was crimped off the barb, or the tube was never inserted to the shoulder | Cut out the joint and remake with a new ring and fitting |
| Visible crack in the ring | Double crimp, over-crimp, wrong ring size, or a work-hardened ring | Remove the ring with a ring cutter, inspect the tube for scoring, remake |
| Gauge passes but the joint weeps at test | Scored tube, damaged barb, or a ring seated on the wrong part of the insert | Cut out and remake; inspect the removed fitting for a shaved barb |
| Jaws will not close over the ring | Wrong jaw size, ring not seated in the jaw groove, or ring pushed against the fitting shoulder | Stop, confirm size, reposition; do not extend the handles for leverage |
| Ratchet will not release | Incomplete stroke or a damaged ratchet mechanism | Complete the stroke if safe; otherwise retire the tool and note it |
| Fitting pulls out during pressure test | Tube not inserted fully, missing insert, or mismatched ring and fitting standards | Condemn the joint; verify the fitting standard against the ring packaging before continuing |
One pattern that does not appear in the table but shows up in commissioning is thermal: joints that pass a cold pressure test and weep after the system reaches operating temperature. The usual cause is an elliptical crimp from an angled tool, which opens slightly as the tube expands. If a system leaks only when hot, suspect crimp geometry before suspecting the fittings.
Cold weather, tight bays, and repairs
PEX stiffens as it cools. Below roughly 5 degrees Celsius, the tube resists re-rounding, the ring bites less evenly, and insertion depth becomes guesswork because the tube will not slide the last few millimetres without effort. Warm the tube end in your hands or bring a coil into a heated space for an hour before working. Do not use a torch, a heat gun on high, or hot water poured from a kettle; localised heat changes the material and can ovalise the end.
Tight joist bays and cabinet interiors create the other common problem: the tool cannot be held square to the tube. Short-jaw crimpers and compact battery tools exist for exactly these positions, and a right-angle or offset jaw is cheaper than a remake. If the only path to the ring is at an angle, cut the tube longer, crimp in free air, and reposition the run rather than crimping crooked in place.
Repairs on a crimped system are straightforward but uncompromising. Removing a joint means cutting the ring with a ring cutter, cutting the tube on both sides of the fitting, and splicing with a repair coupling or two couplings and a short length of tube. A crimped ring cannot be reopened, slid back, or reused, and no amount of re-crimping will restore one that has been disturbed. Slip couplings and push-fit repair fittings are legitimate for emergency shutdowns, but the permanent repair on a crimp-ring system should be a crimp joint made to the same standard.
Pressure testing and handover
A crimp joint is only proven by pressure. Test the system before any covering goes on, with all joints exposed and accessible, and follow the local code for test medium, pressure, and duration. Where the code is silent, a common residential practice is a water test at around 100 psi for 15 to 30 minutes, or a longer hold where the specification requires it. Air testing is faster to dry out but stores far more energy; if air is used, keep people out of the test zone, use regulated pressure, and do not exceed the tubing and fitting ratings.
Two practical notes save arguments at handover. First, photograph the gauge check on a sample of joints per zone, not because the photograph proves anything technically, but because it demonstrates that gauging happened at all. Second, leave the system pressurised with a gauge in view overnight where the schedule allows; small weeps that pass a 20-minute test often show up over eight hours as a slow pressure drop or a damp patch at a joint.
If a joint fails, resist the temptation to tighten or re-crimp. Cut it out, diagnose against the table above, and remake. A second failure at the same location usually means the tube itself is damaged or the fitting was the wrong standard, and no amount of tool work fixes either.
Choosing the tool: manual ratchet, battery, or hydraulic
For occasional work and anything up to 1/2 inch, a good manual ratchet crimper is enough. It is light, needs no charging, and the ratchet enforces full closure. The economics shift quickly on larger work: a 3/4-inch crimp takes noticeably more hand force, and a crew making sixty or eighty joints a day will lose time and consistency to fatigue long before the tool wears out.
Battery crimpers trade price and weight for repeatability. They close to a set diameter every cycle regardless of how tired the operator is, which matters on long runs where the fortieth joint should be identical to the first. They still need calibration checks and jaw inspection; the motor does not detect a worn jaw any better than a hand does. Hydraulic tools sit at the top of the range for 1-inch work and high-volume commercial projects, where the weight penalty is offset by cycle speed.
Whichever type you buy, confirm four things before purchase: that jaws are available in every size you install, that the tool ships with or accepts a matching go/no-go gauge, that the manufacturer publishes a calibration procedure and a jaw-gap specification, and that spare jaws and ratchet parts are stocked locally. A tool with no service path becomes a doorstop the first time it drifts out of calibration.
Terminating the run: valves, transitions, and thread standards
The last joint on a branch is usually not another coupling. It is a valve or a threaded transition, and this is where crimp work meets procurement. A PEX ball valve at the head of each fixture group gives you isolation without draining the system, and it is far easier to install during the rough-in than to add later. When specifying one, confirm the connection end style explicitly, because "PEX ball valve" in a catalogue can mean a crimp-ring end, a press end, or a push-fit end depending on the range.
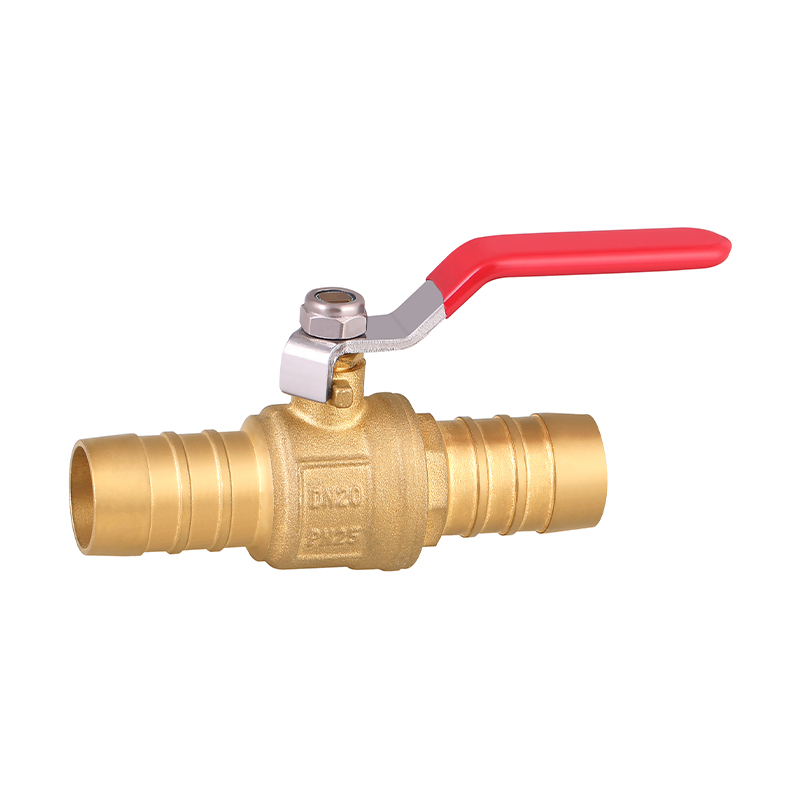
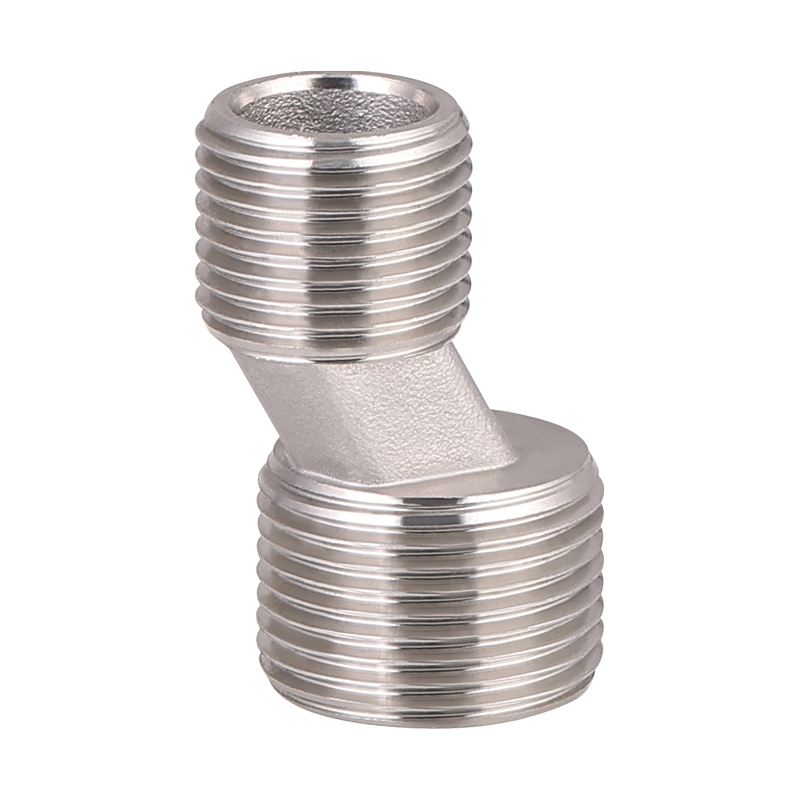
Transitions to threaded pipe deserve equal care. A male brass coupling takes the PEX run out to a threaded connection at a water heater, manifold, or fixture stub, and the thread standard is the detail that ruins shipments. BSP and NPT threads look similar at a glance and do not seal against each other reliably; a mixed pallet arriving on site is a schedule problem, not a technical one. Confirm the thread standard, the nominal size, and the pressure rating in writing on the purchase order, and check the fitting's listing against the ring standard you are installing.

Brass quality matters more than most crews expect. In hard or aggressive water, dezincification-resistant alloys are worth specifying for valves and fittings that will sit wet for decades. Lead content is a separate compliance question in potable-water systems, and the relevant benchmark in North America is a weighted average lead content of no more than 0.25 percent under NSF/ANSI 372, with the alloy and any wetted surface verified rather than assumed. Nickel plating is a finish decision, not a corrosion guarantee, and it should never be used to justify a lower alloy grade underneath.
For a deeper walk-through of the connector side of the work, this guide to installing brass PEX connectors covers insertion practice and fitting selection in more detail than a crimp-focused article can.
Tool care and the fifteen-minute calibration routine
Crimp tools drift. Jaws wear at the contact faces, pivot pins develop play, and a tool that was perfect at the start of a project can be out of specification by the end of it. The defence is a short, boring routine.
- At the start of each shift, close the jaws gently until they touch and measure the gap between the handles or the jaw faces with a caliper, comparing against the manufacturer's specification.
- Adjust the tool only with the mechanism the manufacturer provides. Adding washers or filing a jaw changes the crimp diameter and voids any calibration claim.
- Wipe the jaw faces clean of dust and cured sealant. Debris on the jaw face is transferred directly into the crimp diameter.
- Oil the pivot points lightly and keep lubricant off the jaw faces, where it collects grit.
- Inspect jaws for chips, rounding, and misalignment after any joint that felt wrong, and replace rather than repair.
- Log the check date and result. On commercial work, that log is often the difference between a smooth inspection and a re-test of the whole floor.
- Store the tool in its case with the jaws closed but not forced, and keep the gauge with it.
Retire a tool when the manufacturer's adjustment range is exhausted, when jaws are visibly worn, or when a gauge check fails twice in a row after correct adjustment. A crimper is a precision instrument with a rough job; treating it like a hammer is how a project ends up chasing leaks through finished ceilings.
Using a PEX crimp tool well is not a matter of hand strength. It is a matter of sequence: confirm the system and the standard, cut square, re-round, mark depth, seat the ring in the window, close the jaws to release, and prove the result with a gauge at two points. The two-second squeeze is the least interesting part of the joint, and it is also the part most likely to be blamed when something goes wrong.
The crews who avoid callbacks share a small set of habits rather than better tools. They keep the gauge in the same pocket as the marker. They cut out a suspect joint without arguing about it. They write the thread standard on the purchase order and check the ring standard against the fitting listing before the first crimp of the day. None of that is difficult, and all of it is cheaper than opening a wall. Match the jaw, place the ring, close the tool fully, and measure every joint; the rest of the system will take care of itself.